Warm Chocolate Coconut Sundaes with Toasted Coconut Crunch
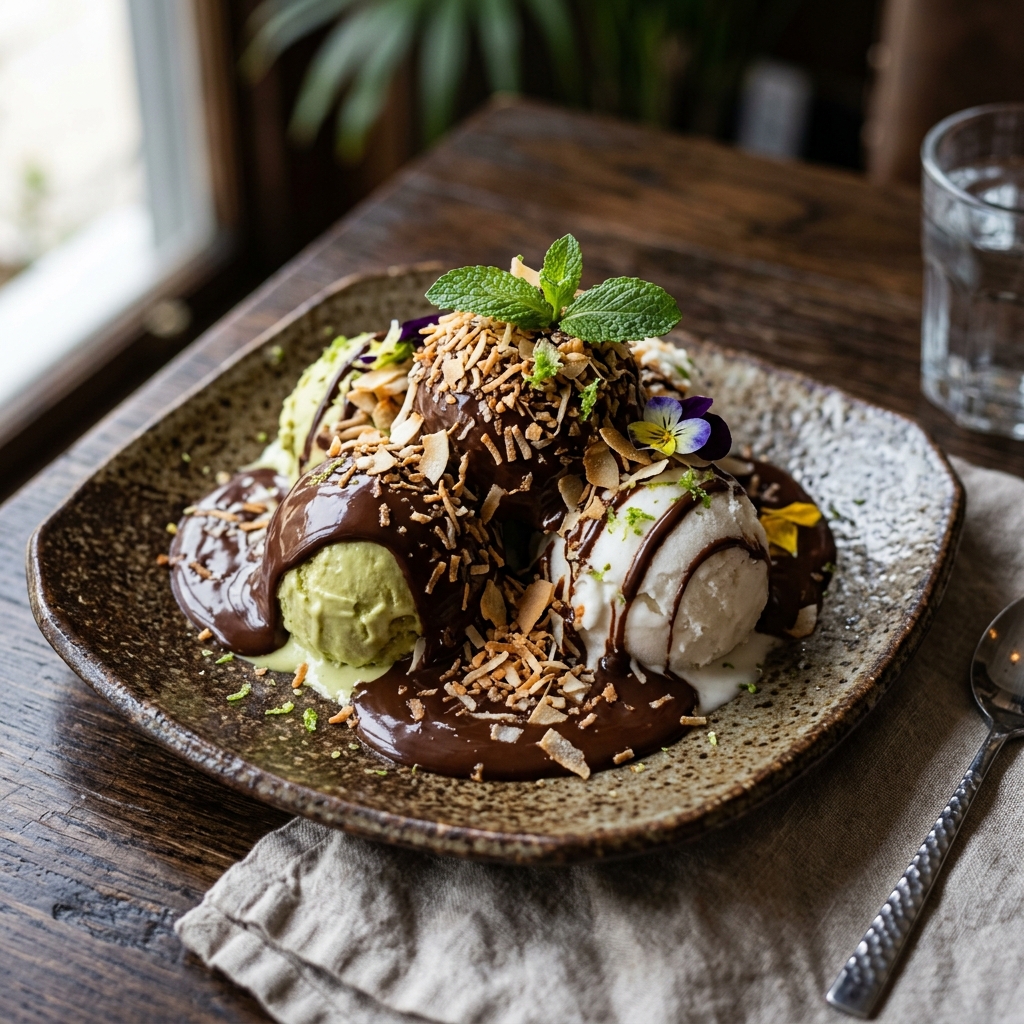
This easy plated dessert turns your avocado and coconut ice creams into a restaurant-style sundae with a warm, glossy chocolate sauce and crisp toasted coconut. The flavor is rich and balanced: dark chocolate bitterness, creamy tropical coconut, and the subtle buttery freshness of avocado ice cream. Warm sauce against cold ice cream creates a luxurious texture contrast, while the toasted coconut adds a nutty crunch.
Ingredients
- avocado ice cream200 g (about 1 cup, 2 scoops per person), kept frozen until serving
- coconut ice cream200 g (about 1 cup, 2 scoops per person), kept frozen until serving
- dark or milk chocolate120 g (about 3/4 cup chopped), finely chopped for faster melting
- coconut60 g (about 3/4 cup), shredded or finely sliced
- water45 ml (3 tbsp)
- salt1 g (1 small pinch)
Instructions
- 1Set up for easy serving
Place 2 serving bowls or shallow dessert plates in the freezer. Keep both ice creams frozen while you prepare the toppings so they stay firm and scoop neatly later.
2 min offCues: The serving bowls should feel very cold when touched.Tip: Cold bowls slow melting and make the dessert look cleaner. - 2Toast the coconut
Put the coconut in a dry frying pan in a thin, even layer. Toast over medium-low heat, stirring every 20 to 30 seconds, until it turns light golden and smells nutty and sweet.
3-5 min medium-lowCues: The coconut should have patchy golden edges and a fragrant toasted aroma, not dark brown spots.Tip: As soon as it is toasted, transfer it to a plate so the hot pan does not keep cooking it. - 3Melt the chocolate
Add the chopped chocolate, water, and salt to a small heatproof bowl. Set the bowl over a small pan with barely simmering water, making sure the bowl does not touch the water, and stir until smooth and glossy.
3-4 min lowCues: The sauce should look shiny, pourable, and free of lumps.Tip: If the sauce seems too thick to drizzle, stir in 5 to 10 ml more warm water, 1 teaspoon at a time. - 4Cool the sauce slightly
Remove the chocolate bowl from the heat and let it stand briefly. Stir once after 1 minute so the heat evens out.
2 min offCues: The sauce should still be warm but no longer steaming heavily; it should ribbon off the spoon.Tip: Slightly cooled sauce clings better to ice cream instead of instantly melting it. - 5Scoop the ice cream
Take the chilled bowls from the freezer. Scoop 2 scoops of avocado ice cream and 2 scoops of coconut ice cream into the 2 bowls, alternating flavors for a balanced look.
2-3 min offCues: The scoops should hold a rounded shape and sit firmly without collapsing.Tip: Dip the scoop in warm water and wipe it dry between scoops for smoother shapes. - 6Add the warm chocolate
Spoon or drizzle the warm chocolate sauce over the scoops, letting some run down the sides. Use about half the sauce on each portion, but leave a little ice cream visible for contrast.
1 min offCues: The chocolate should coat the top in glossy streaks while the ice cream remains mostly intact.Tip: Drizzle from a spoon held slightly high for elegant thin lines. - 7Finish with coconut crunch
Scatter the toasted coconut over the chocolate and exposed ice cream. Serve immediately while the sauce is warm and the ice cream is firm.
1 min offCues: You should see a mix of glossy sauce, snowy and golden coconut, and distinct scoops.Tip: Add the coconut just before serving so it stays crisp.
Chef tips
- Finely chopped chocolate melts faster and gives a smoother sauce with less risk of scorching.
- Toasted coconut tastes best when cooled completely before topping, because it stays crisp.
- A pinch of salt in chocolate sharpens flavor and makes the dessert taste more balanced.
- Chilled bowls buy you extra serving time and reduce melting during plating.
- If your ice cream is very hard, let it sit at room temperature for 2 minutes only, just until the scoop can glide through with firm pressure.
Cooking video
No cooking video available yet.
Cook this dish safely
Follow safe food-handling practices — keep raw and ready-to-eat foods separate, cook applicable foods thoroughly, and refrigerate perishable foods promptly.
- This recipe features raw or lightly-cured seafood — it carries an inherent risk that thorough cooking otherwise removes.
Only use sushi- or sashimi-grade fish from a reputable supplier. Most raw fish recipes (sushi, sashimi, ceviche, tartare, poke) call for fish that has been previously frozen following FDA guidance to reduce parasite risk. Keep the fish at or below 40°F / 4°C until service, work on a clean, chilled surface, and consume the same day. Not recommended for pregnant, elderly, very young or immunocompromised diners.
Keep milk, cream, cheese and yogurt at or below 40°F / 4°C. Once served, never leave perishables at room temperature longer than 2 hours (1 hour above 90°F / 32°C). Any leftover dairy-based sauce or custard is safest eaten within 3-4 days.
Refrigerate any leftovers within 2 hours of cooking, in shallow airtight containers, and eat within 3-4 days. Reheat to steaming hot (165°F / 74°C) before serving. Freeze portions you won't eat in that window.
This list is based on the recipe's ingredients. Cross-contact during preparation or shared kitchens may still introduce allergens — always check individual products.